VMware .GHO文件安装系统的方法
现在很多系统都直接发gho文件因为是体积过大,再者刻盘也不方便,如果下载后想测试安装一下又不想物理机安装,那么vm虚拟机是一个很好的方法.
这时候系统是gho,没有安装菜单,不支持分区怎么办?那么看下面的方法,不需要iso虚拟机测试安装gho系统的方法.
还有一种情况是物理机安装了系统发现不对劲,怀疑是安装工具修改了系统,排查重装系统又太麻烦,就可以用虚拟机测试了.
准备ghostwin7系统,以及win8.1ghost,win10ghost 都可以按照以下方法安装
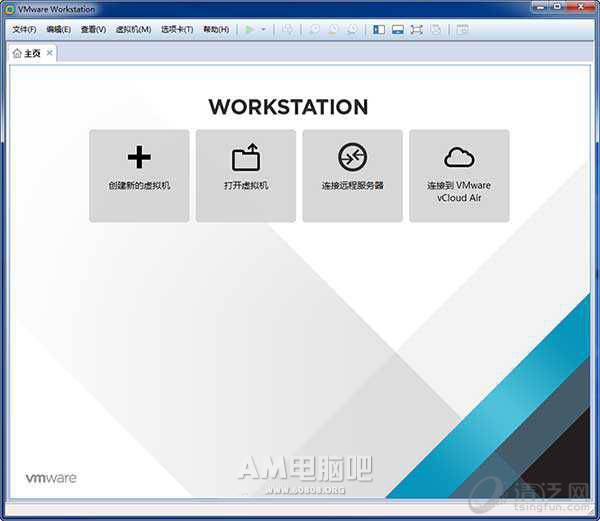
首先官方下载VMware虚拟机
diskgenius单文件已注册版本,以下简称DG.
提供一个GHO镜像浏览器吧,运行一次会自动关联gho镜像文件的: Ghostexp.zip</a>
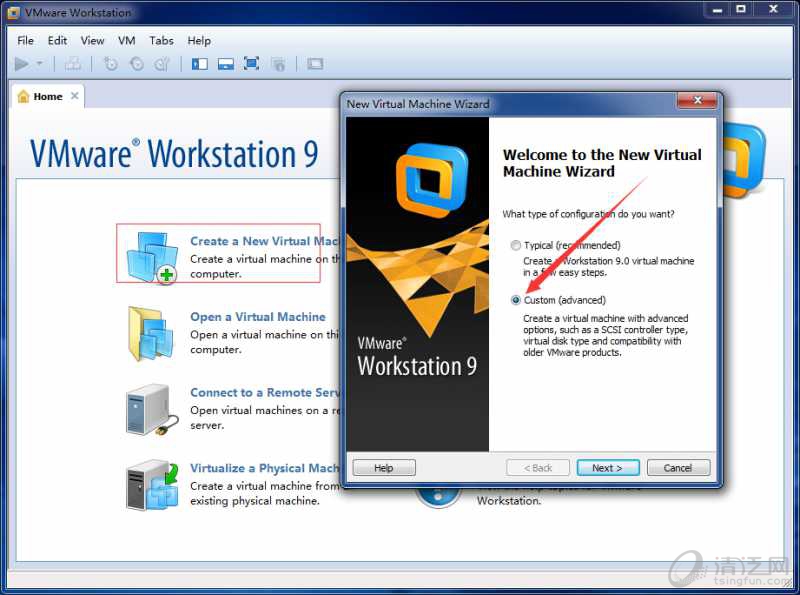
然后创建虚拟系统,阿木是vm9.02英文版,习惯了就不跟新了,下面以安装Win8.1ghost.gho系统为例:
自定义创建:
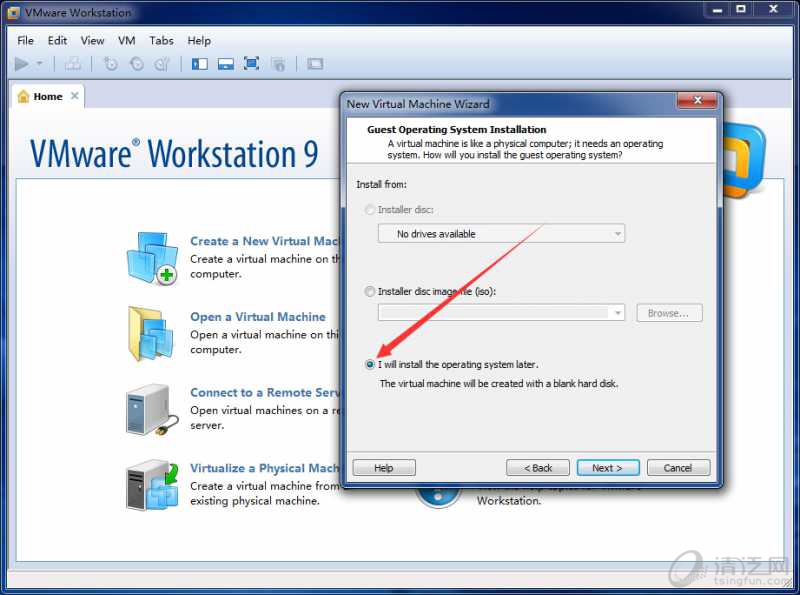
不需要加载光驱:
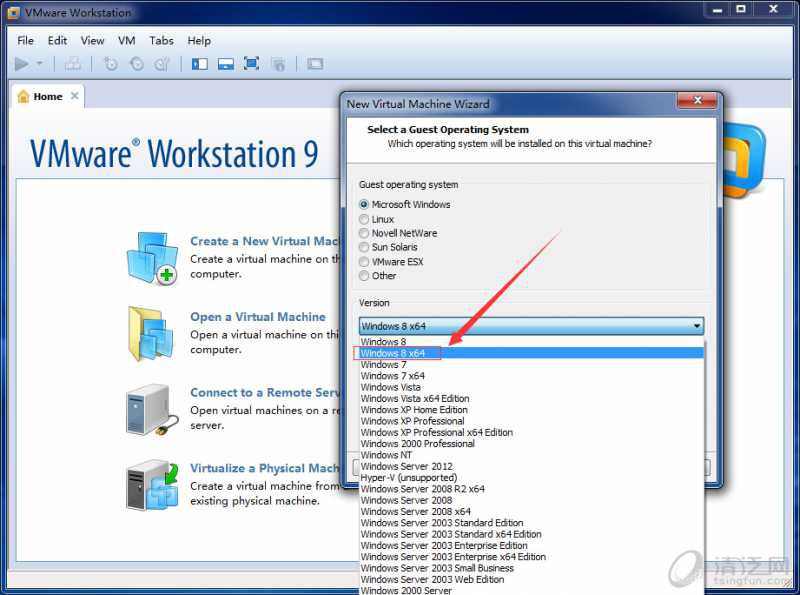
这里可选择创建的虚拟系统的版本,这里是选择Windows8
虚拟系统保存目录选择,可自定义:

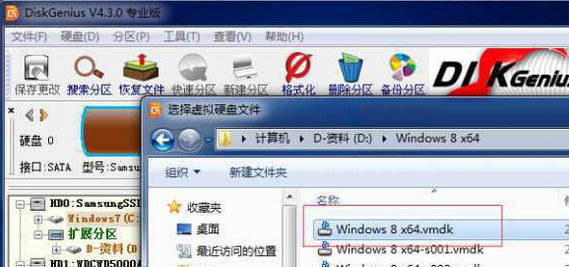
创建完虚拟机后打开DG分区工具,打开虚拟硬盘文件,就是虚拟系统的文件:
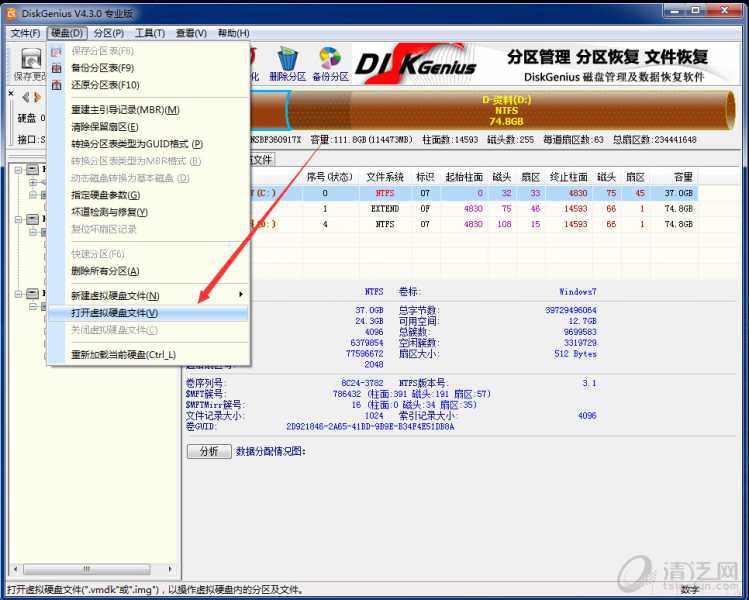
第一个就是,看好了,别选错:
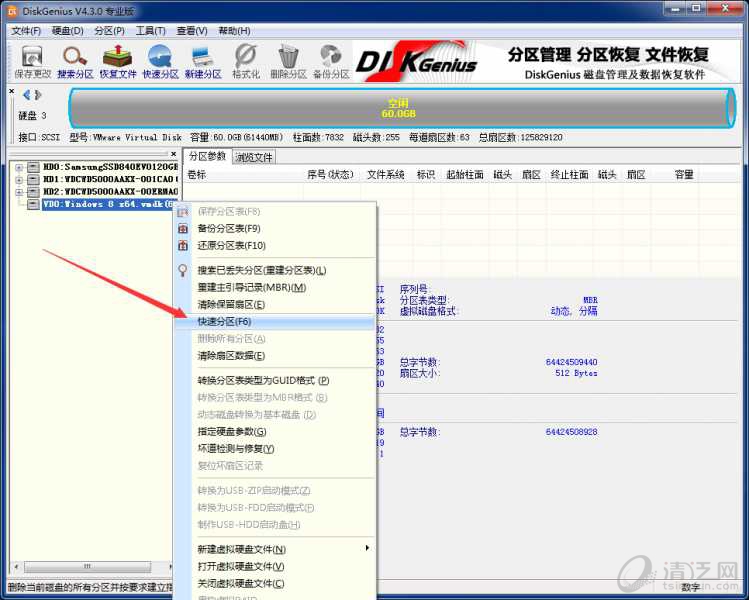
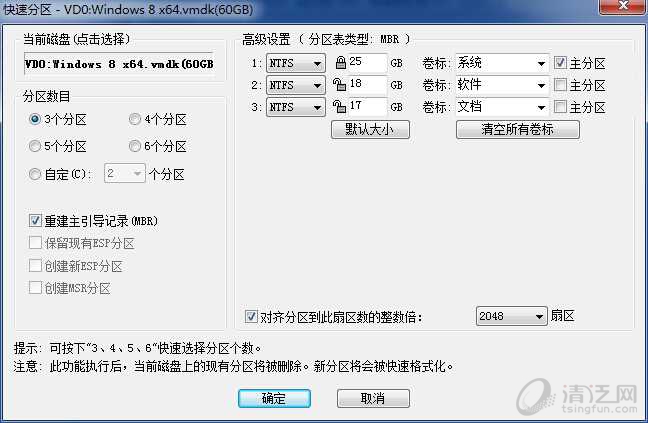
右键对准虚拟硬盘快速分区:
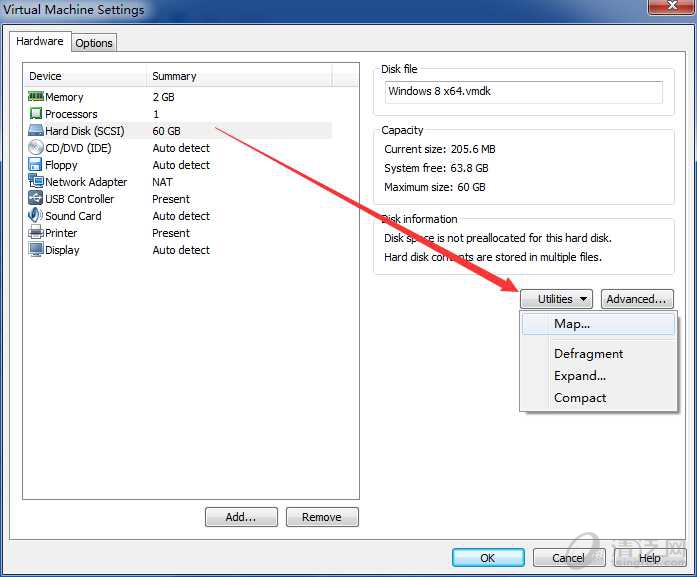
然后打开虚拟机的磁盘管理,加载到物理机Z盘:
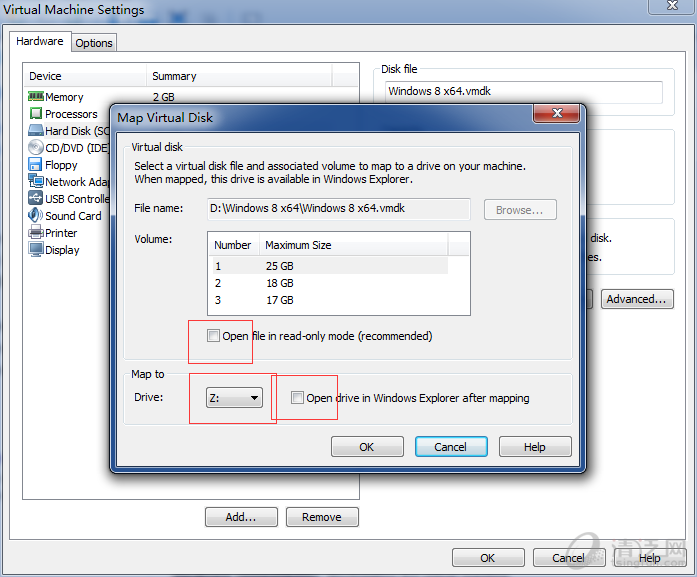
选择虚拟机的C盘,去掉读写保护:
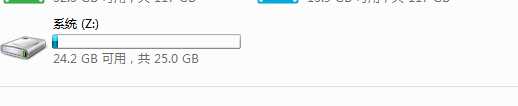
打开我的电脑就出现了Z盘:
然后用gho镜像浏览器打开gho系统镜像文件,全选,右键提取到Z盘:

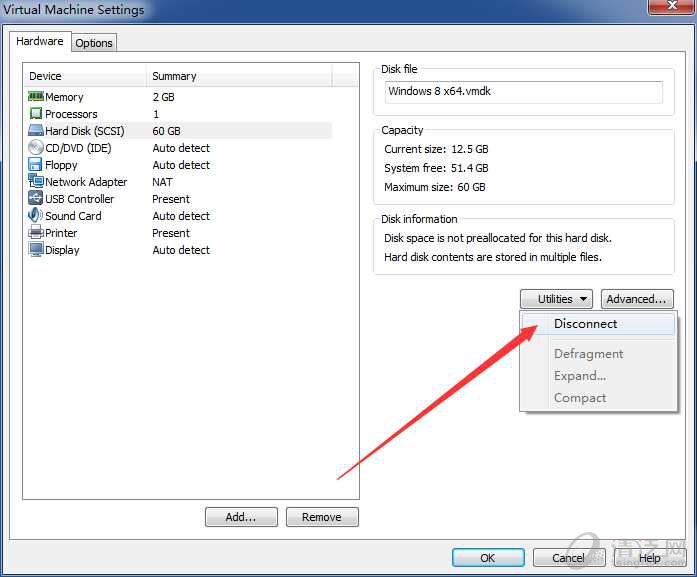
提取复制完后别忘了虚拟机磁盘管理取消共享的Z盘:
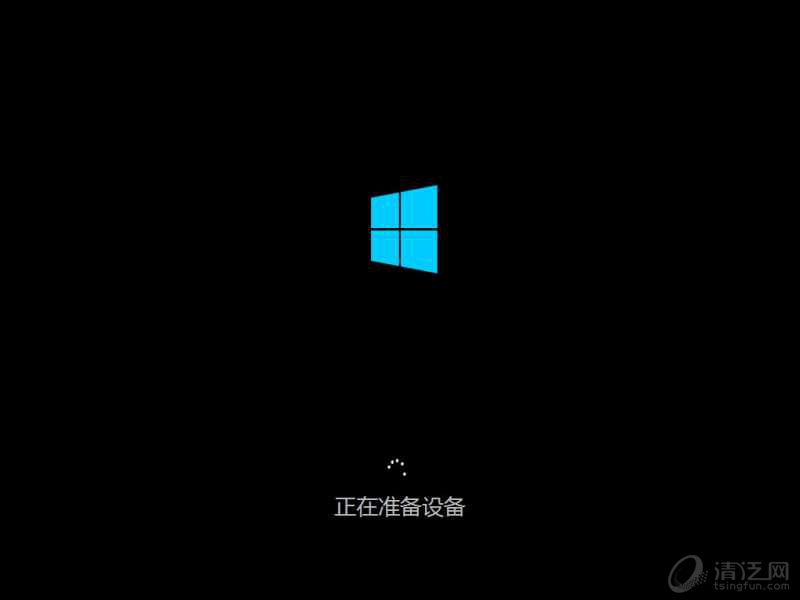
然后打开虚拟机电源启动虚拟系统,看见这个启动界面就是成功了..:如下图
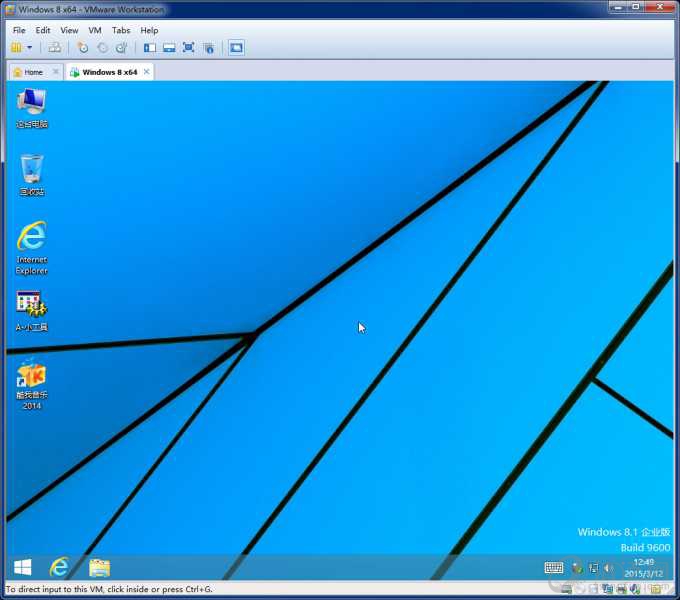
进入桌面,网卡等一切安装完毕:
以上是vm虚拟机安装测试系统的方法只用到了虚拟机和另外两个小工具,并没有用任何iso文件....
掌握了这个方法以后遇到下载的gho就不用担心没法测试了.
上一篇:MFC Dialog对话框DoModal()、Create失败的原因解析
下一篇:无法解析的外部符号 _MiniDumpWriteDump@28,MiniDumpWriteDump lib文件
 评论加载中,请稍后...